
You are here
Managing Users' database
In the My users window, it is possible to display information about those users of the library that made a registration to NILDE. It also allows to manage users’ database, to associate an Institute/Department for each user and to export data.
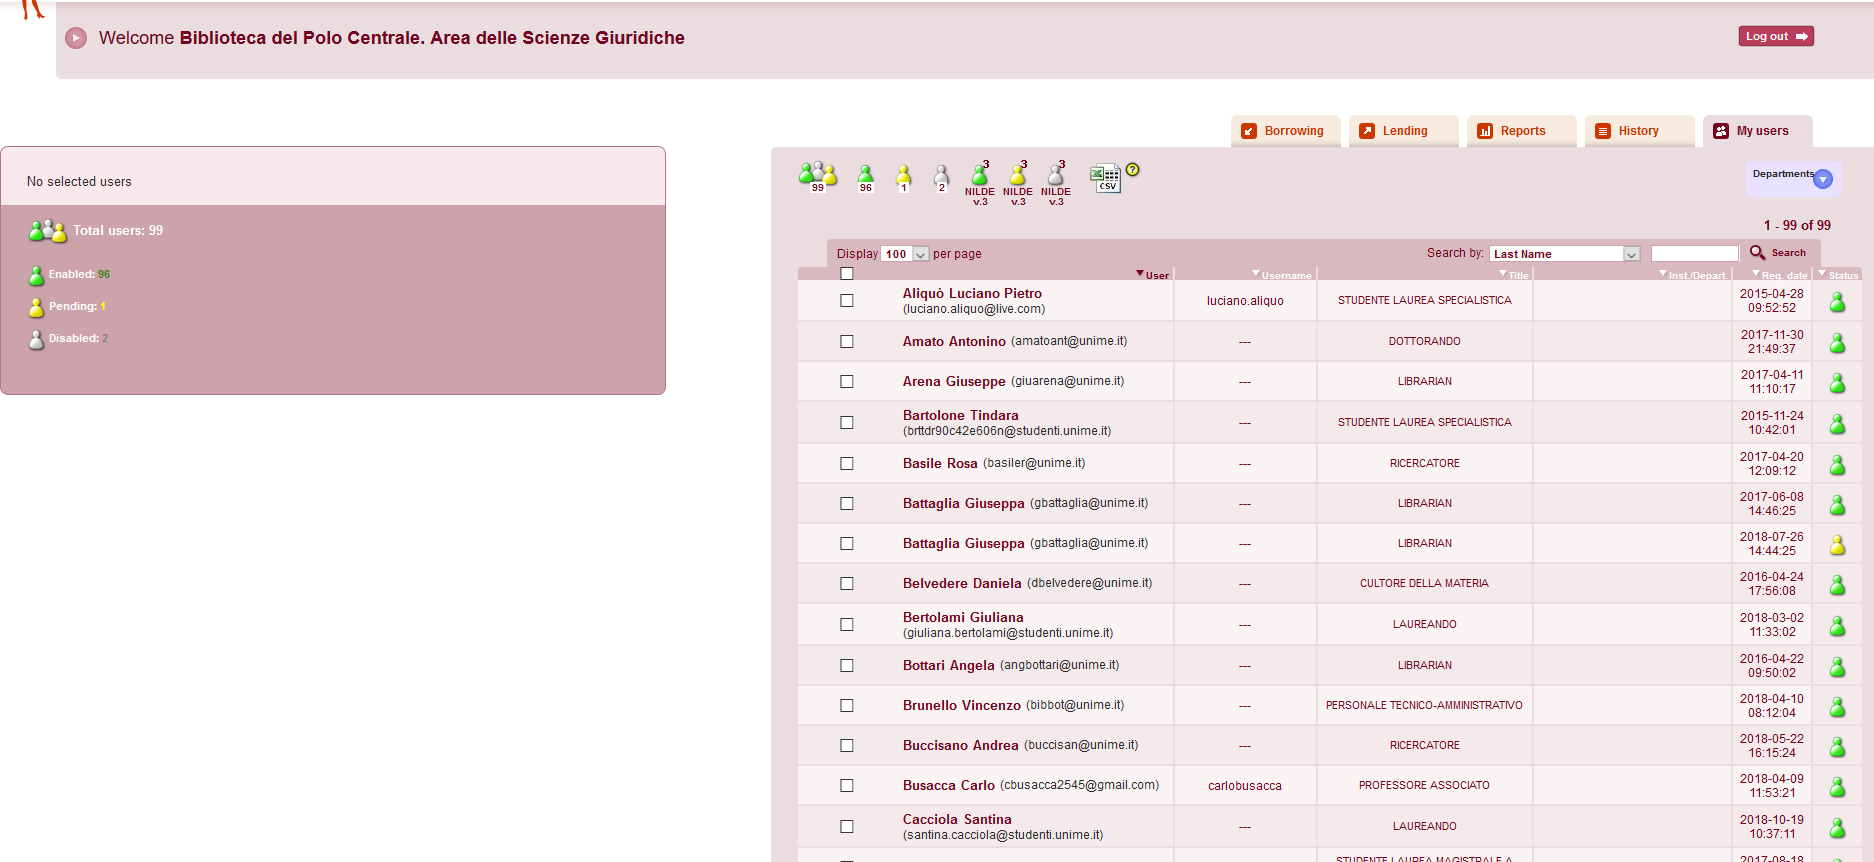
Some specific icons in the top of the window may provide additional information regarding the status and number of users:
 displays all enabled, disabled and pending users; this icon is preselected when "My users" window opens;
 displays only enabled users;
 displays only pending users;
 displays only disabled users.
The meaning of each icon is reported in the box on the left of the section. It can be also retrieved by pointing the mouse over each of them. For the libraries who used the previous version of NILDE, three additional icons (green, yellow and red) are reported. They are marked by the subscript NILDE v.3 and refer to those users who did not update their account.
By clicking on each icon, the list of users are reported below in different columns that refer to:
- User: it contains a user’s forename and family name along with his/her email address;
- Username: it indicates the username selected during the registration. For users accessing NILDE through a IDEM-GARR account, the username is not displayed and is substituted by three lines;
- Title: it contains the title selected by the user;
- Inst./Depart.: it displays the name of the Institute/Department selected by the user during the registration. Alternatively, it can be selected by the Library after the registration;
- Reg. date: it indicates the date of registration to NILDE;
- Status: it associates to the user the icon representing his/her status (enabled, disabled, pending).
Below the set of icons, two additional options facilitate the display and search of users.
It is possible to change the way in which users are displayed in the following ways:
- selecting from the option Display number per page the maximum number of users to display in each page;
- sorting the information in each column in alphabetical, chronological or status order (both ascending or descending).
It is not necessary to scroll down the entire list, but information about a specific user can be retrieved by applying a filter (surname,name, department/institute or title) and clicking on Search.
Before starting a new search, the option complete list should be checked. Users’ status is displayed in the last column (Status) by the specific icon. To change the status of any user, click on the name in the column User. In the box on the left the user setting is displayed, along with all the possible actions according to his/her status:
- : by selecting Disable, the NILDE service becomes unavailable for that user, whose information are maintained in memory. Later he/she can be enabled again or eventually deleted from the system;
- and : by clicking on Enable the user is allowed to exploit NILDE service. Instead by clicking on Delete, information about the user are definitively removed from the system.
Managing the Departments' list
Users can be classified according to their Institute/Department. In this way, you can generate a list of users according to their affiliation. This approach makes easier to supply the requested paper.
Clicking on the icon  on the top-right corner, a new box appears.

If you want to add a new Department, you can enter its name here and click on Enter department. The name of the new Department will appear below in alphabetical order. For each Department in the list, you have three options, marked by the icons in the list on the right hand side:
 : Rename department
 : Delete department
 : Apply department to the selected users
If you want to associate a user or a group of users to a specific department, you should follow the steps below:
- from the users’ list, you select the box(es) referring to the user(s); ·
- from the departments’ list, you select
 close to the selected department.
After this procedure, you will notice that for each user the name of the selected department will appear in the column Inst./Depart.
If you need, you can rename, cancel or modify the affiliation of each user. Removing a department from the list does not remove users, but they can be reassigned to other departments later.
Exporting data
The updated list of users can be exported in a .CSV format (comma delimited file) and imported in Excel by clicking on the icon ![]() .
.
This is a useful option, if you want to create a mailing list.
In fact, the exported file contains the personal details of users, including their status, the type of their account and their email (only password are removed from the information of each user).
Go to the Table of Contents.