
You are here
User Registration
If a user wants to send DD requests to the library he refers to, he must have a NILDE account.
To create an account, click on Register to the NILDE service of your Library, as shown in figure 1.

Figure 1: NILDE login page with the highlighted registration box for new users
There are two kinds of registration:
• the creation of a traditional account, with credentials provided by NILDE system
• the creation of an istitutional account using IDEM-GARR credentials
During the registration, the user is asked if he has got an institutional IDEM-Garr account; the system will guide the user in creating an account, depending on the answer.
If the selection is Yes, an institutional account will be created. If the selection is No, a traditional account will be created.
Registration - Traditional Account
The registration of a traditional user consists of 4 steps:
1. Clicking on No, the user will have to choose Username and Password of the account in order to login
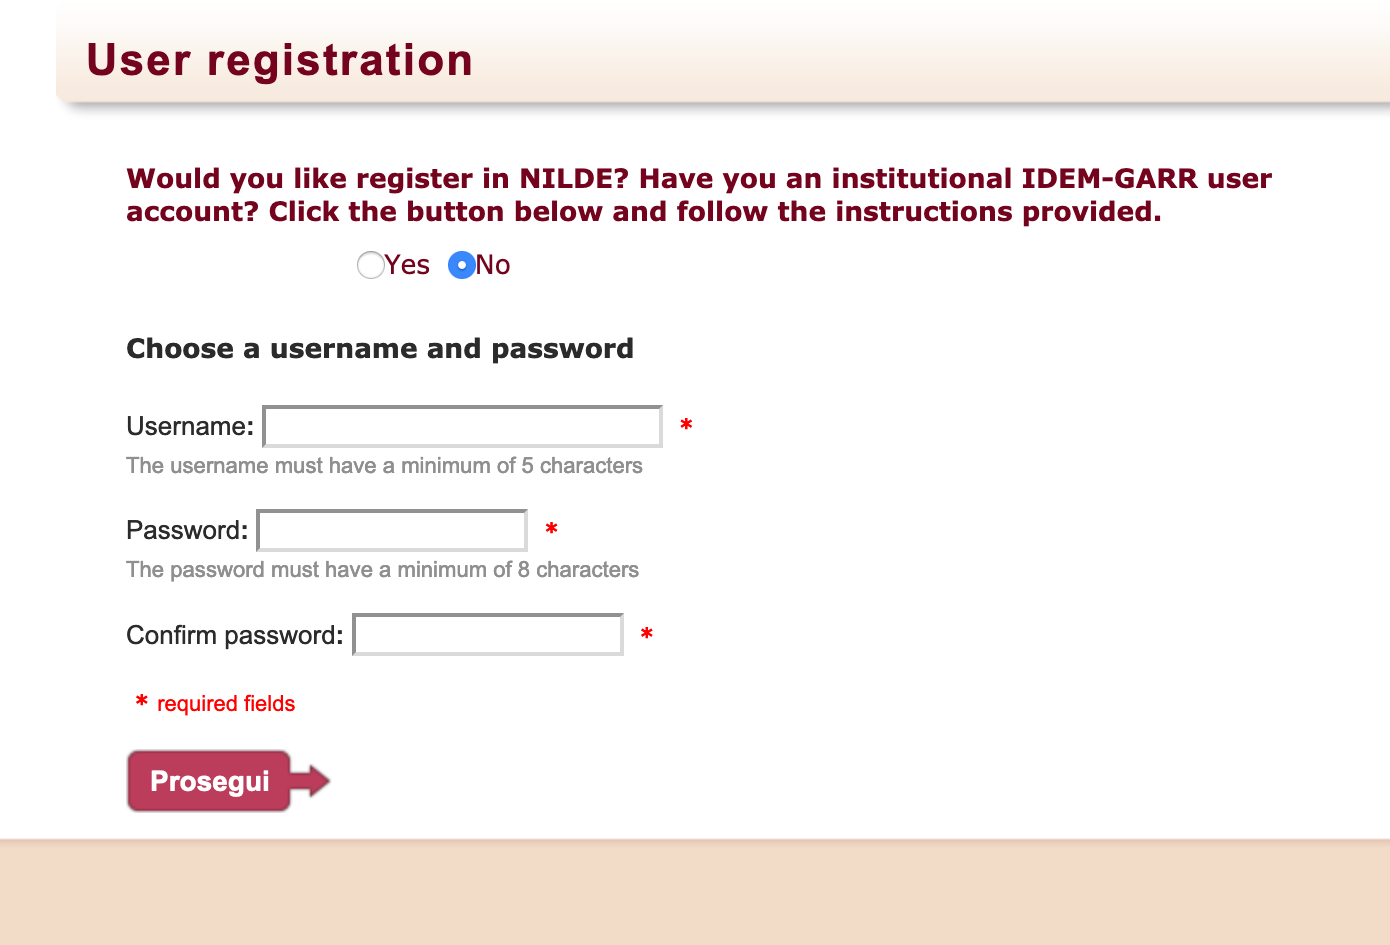
Figure 2: Registration of a traditional user without IDEM-GARR institutional account: form to fill in with username and password
2. In the second step, the user will select the library he refers to, browsing by city, Institution or keyword;
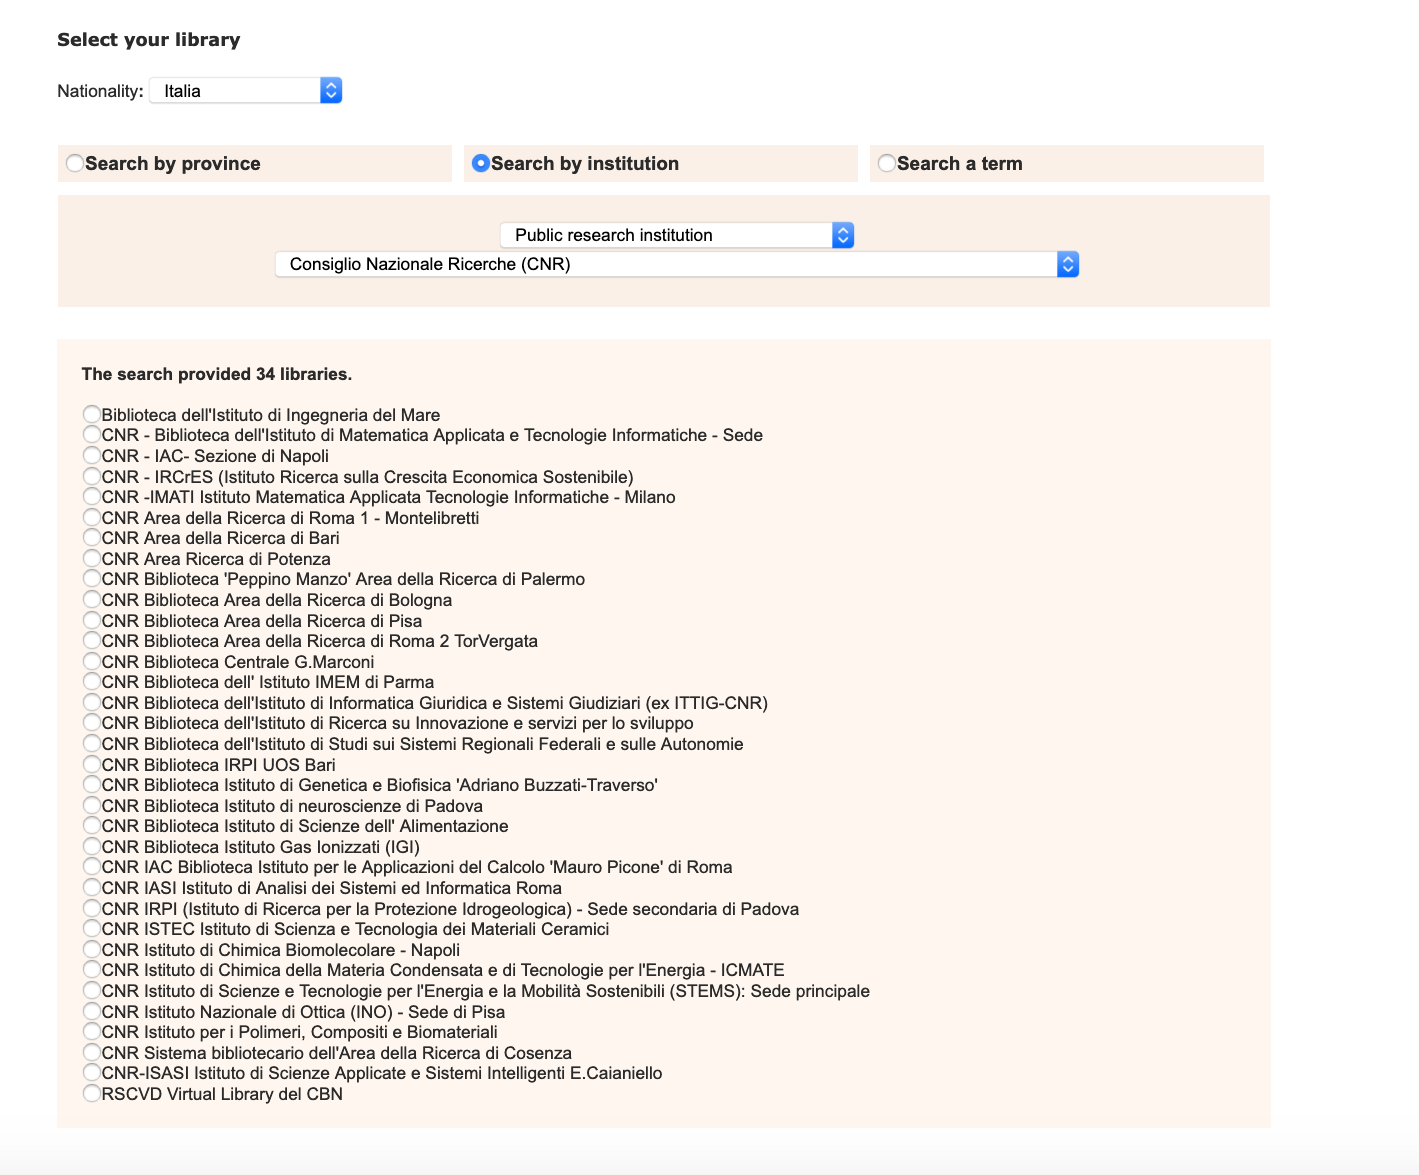
Figure 3: User registration: selection of the library. In the figure, a list of libraries searched by Institution.
3. Fill in the form with personal details. Fields with * are mandatory.

Figure 4: User registration: form with personal data
4. In the last window of the registration, a summary of the information indicated during the process will appear all the details put in the registration will be summed up
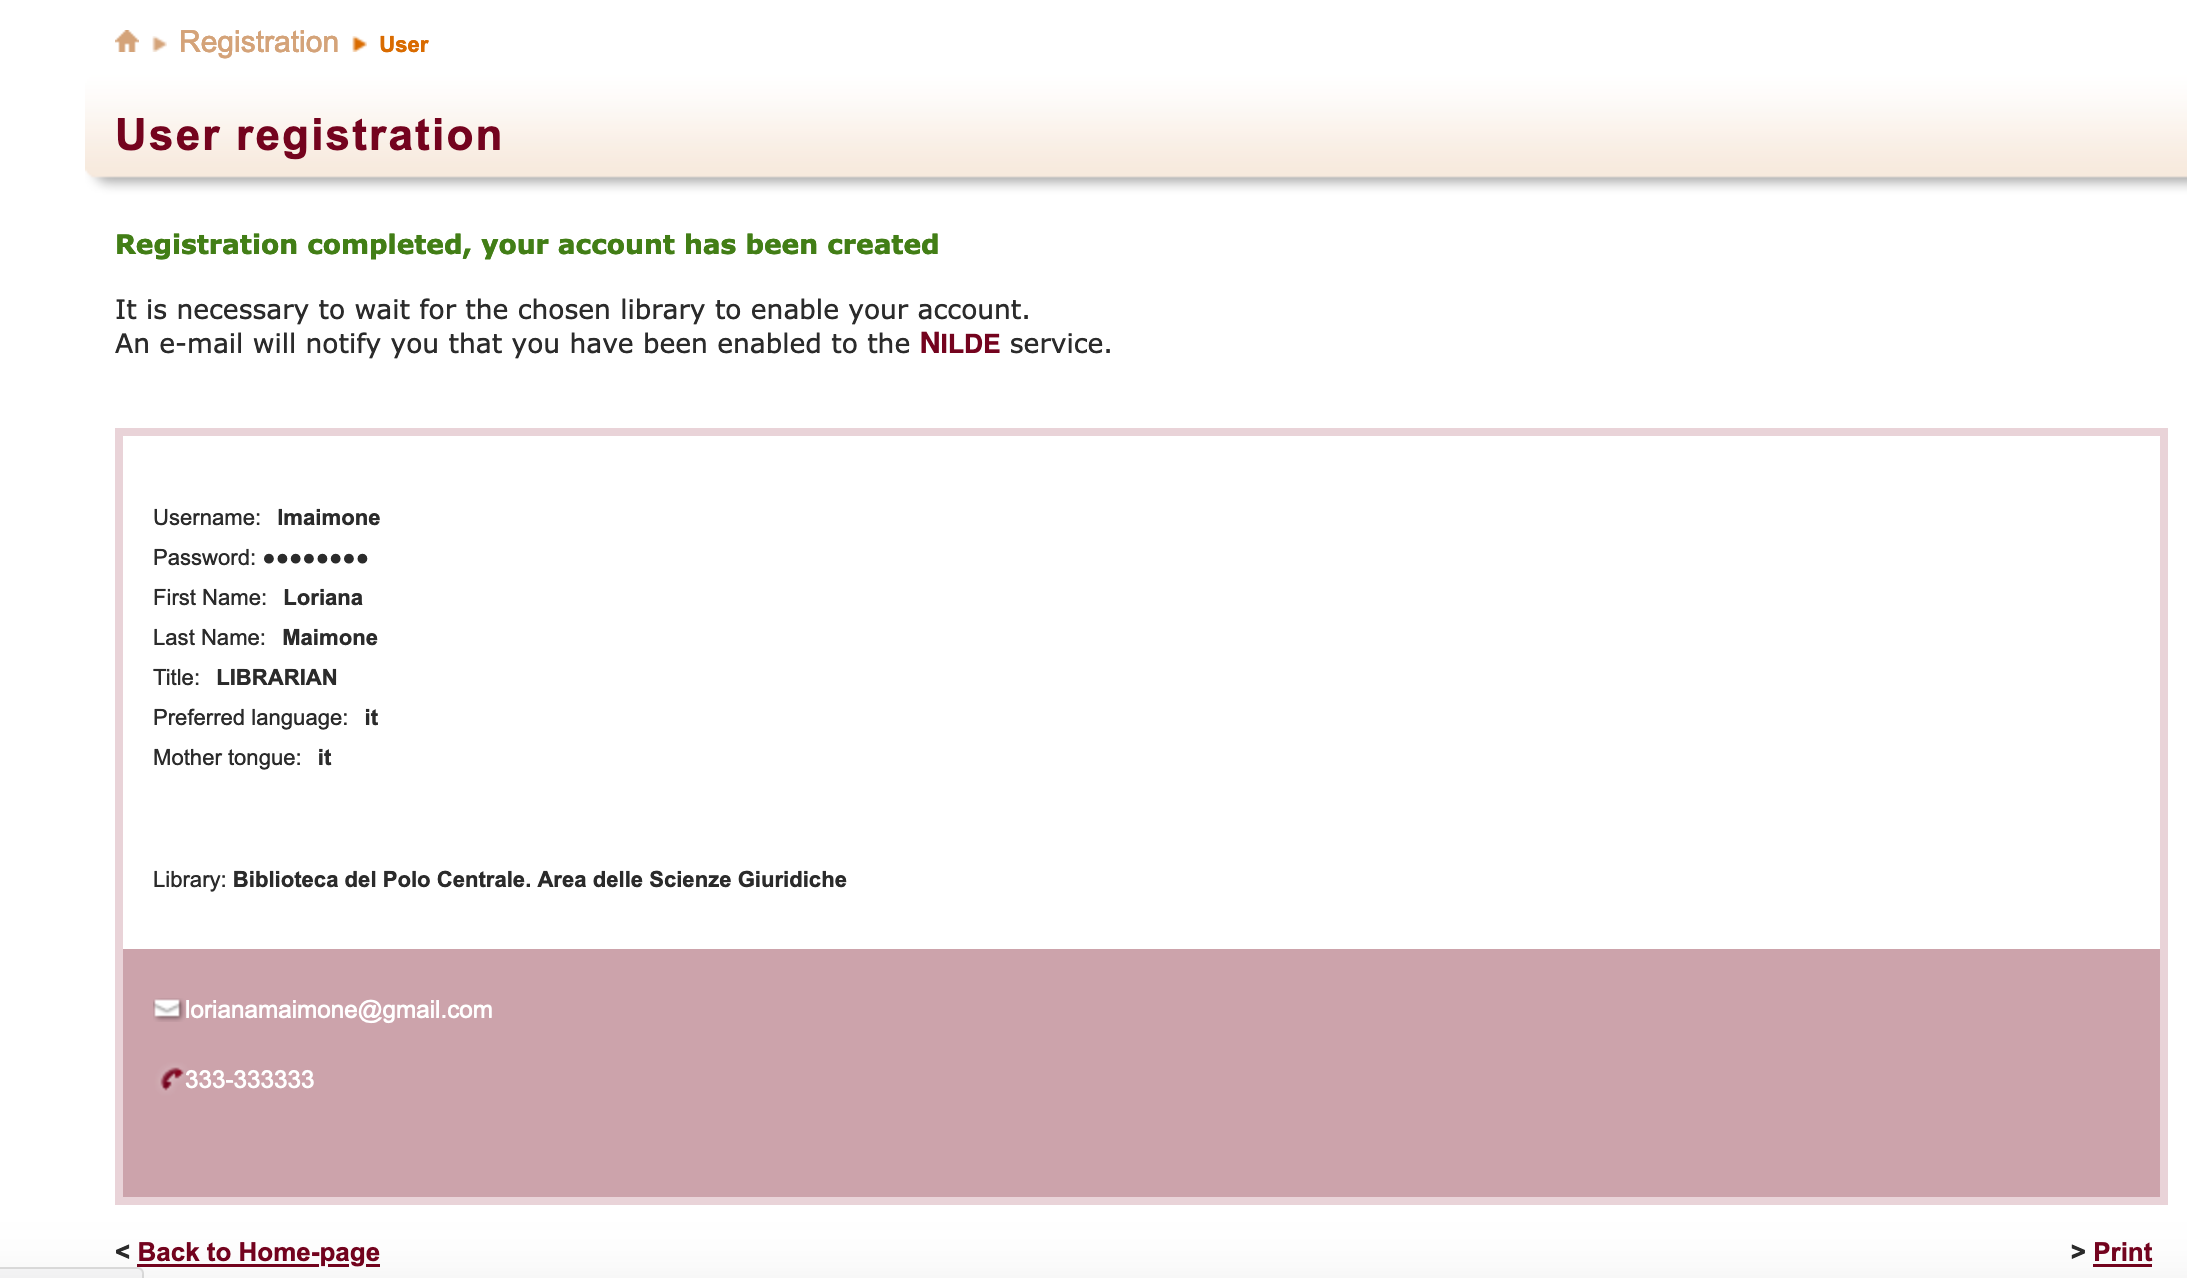
Figure 5: User registration: summary of the information (end of registration)
If the registration has been successful, the system sends a mail to the user, but he will not be able to use the account until the library has enabled him.
As far as the library has enabled the user account, the system will send another mail to confirm the activation of the account.
REGISTRATION – Institutional account with IDEM-GARR credentials
The registration process with IDEM-GARR credentials is different.
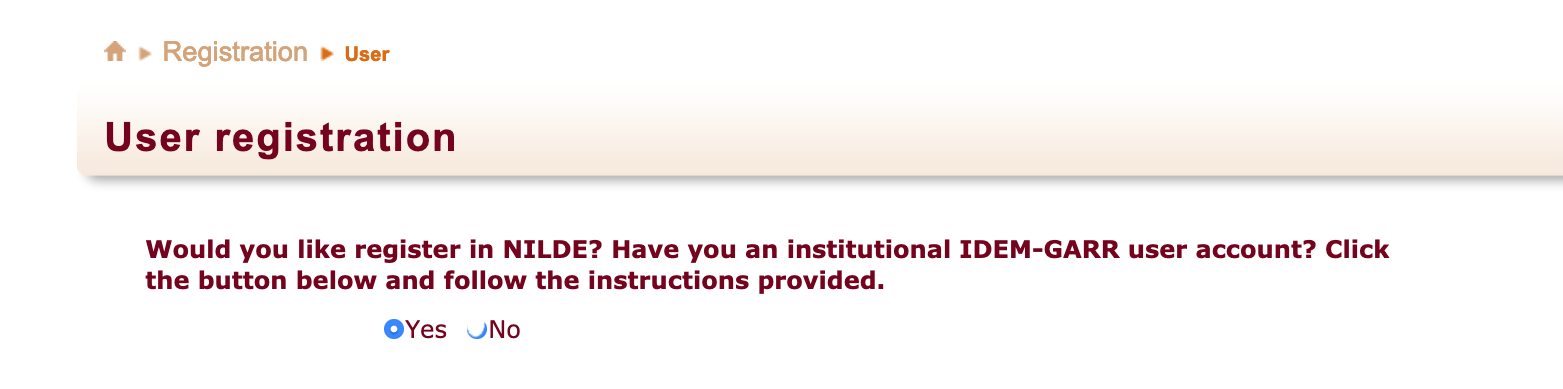
Figure 6: Registration panel for an IDEM-GARR institutional account.
In fig. 7, it is possible to see the options to select.
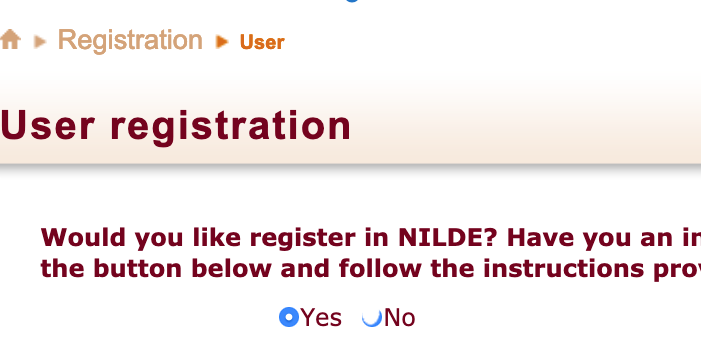
Figure 7: Option to select for an IDEM-GARR institutional account
The user must select Yes if he has got institutional credentials supplied by one of the Institutions belonging to IDEM-GARR federation (IDEM is the Italian national federation for Universities and research Institutions for authentication and authorization; for more details, go to https://www.idem.garr.it/)
The system redirects automatically to IDEM WAYF Service (“Where Are You From Service”), where the user can select his Institution (as in fig. 8) and then set his credentials in the Identity Provider (see fig. 9).

Figure 8: Registration of a user with an institutional account: redirection to IDEM WAYF Service and selection of the Institution.
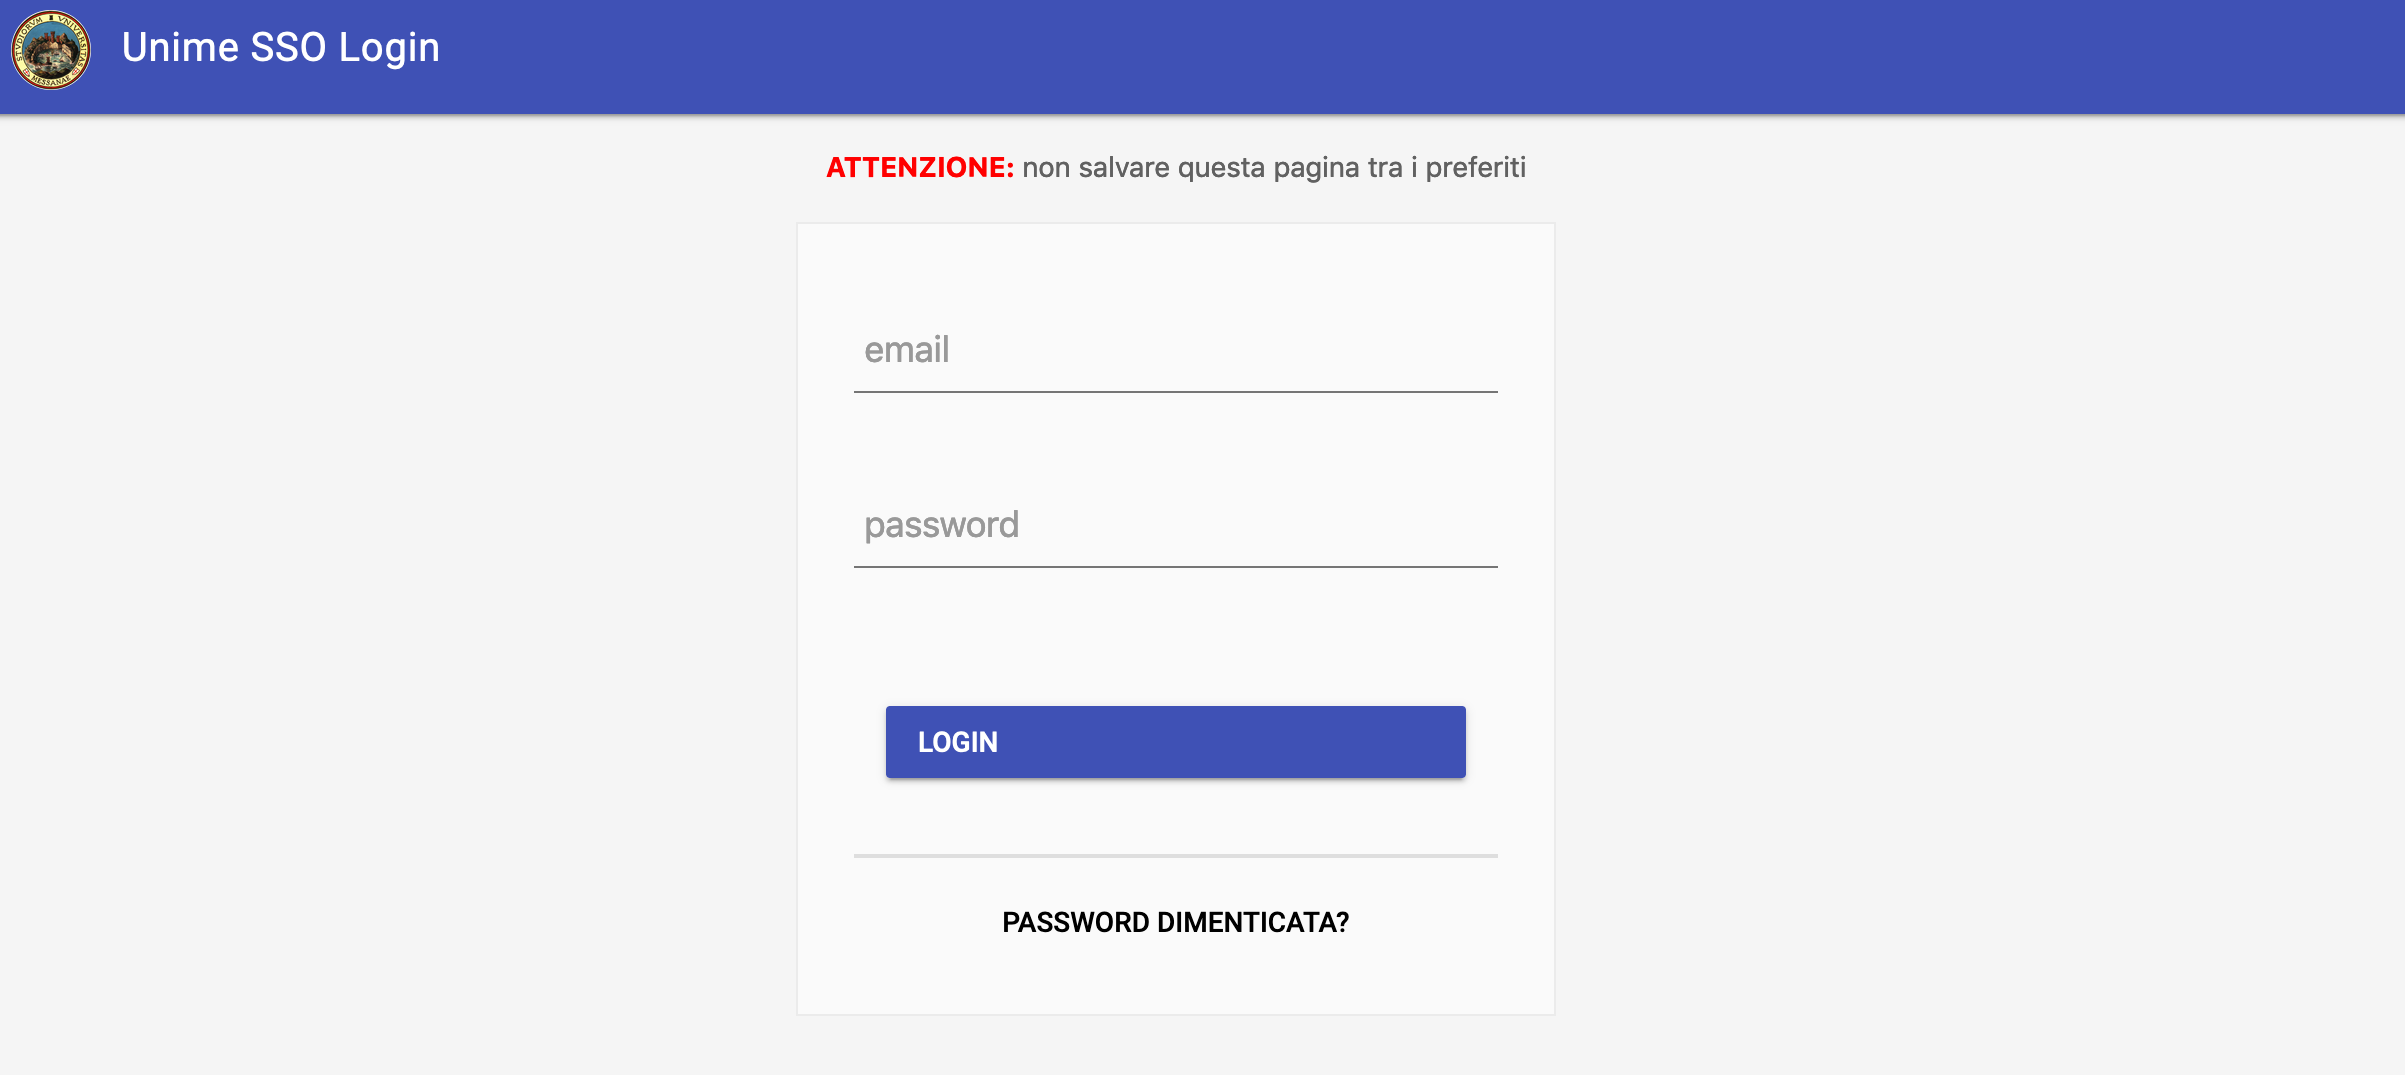
Figure 9: Insert the credentials in the Identity Provider. In this figure, the Institution selected is the University of Messina
The system turns back to NILDE. If the user has never registered to NILDE, it is sufficient clicking on the Registration botton and fill in the requested fields.
If the user has got a previous NILDE traditional account (with credentials supplied by NILDE), he can update his account, making the “migration".
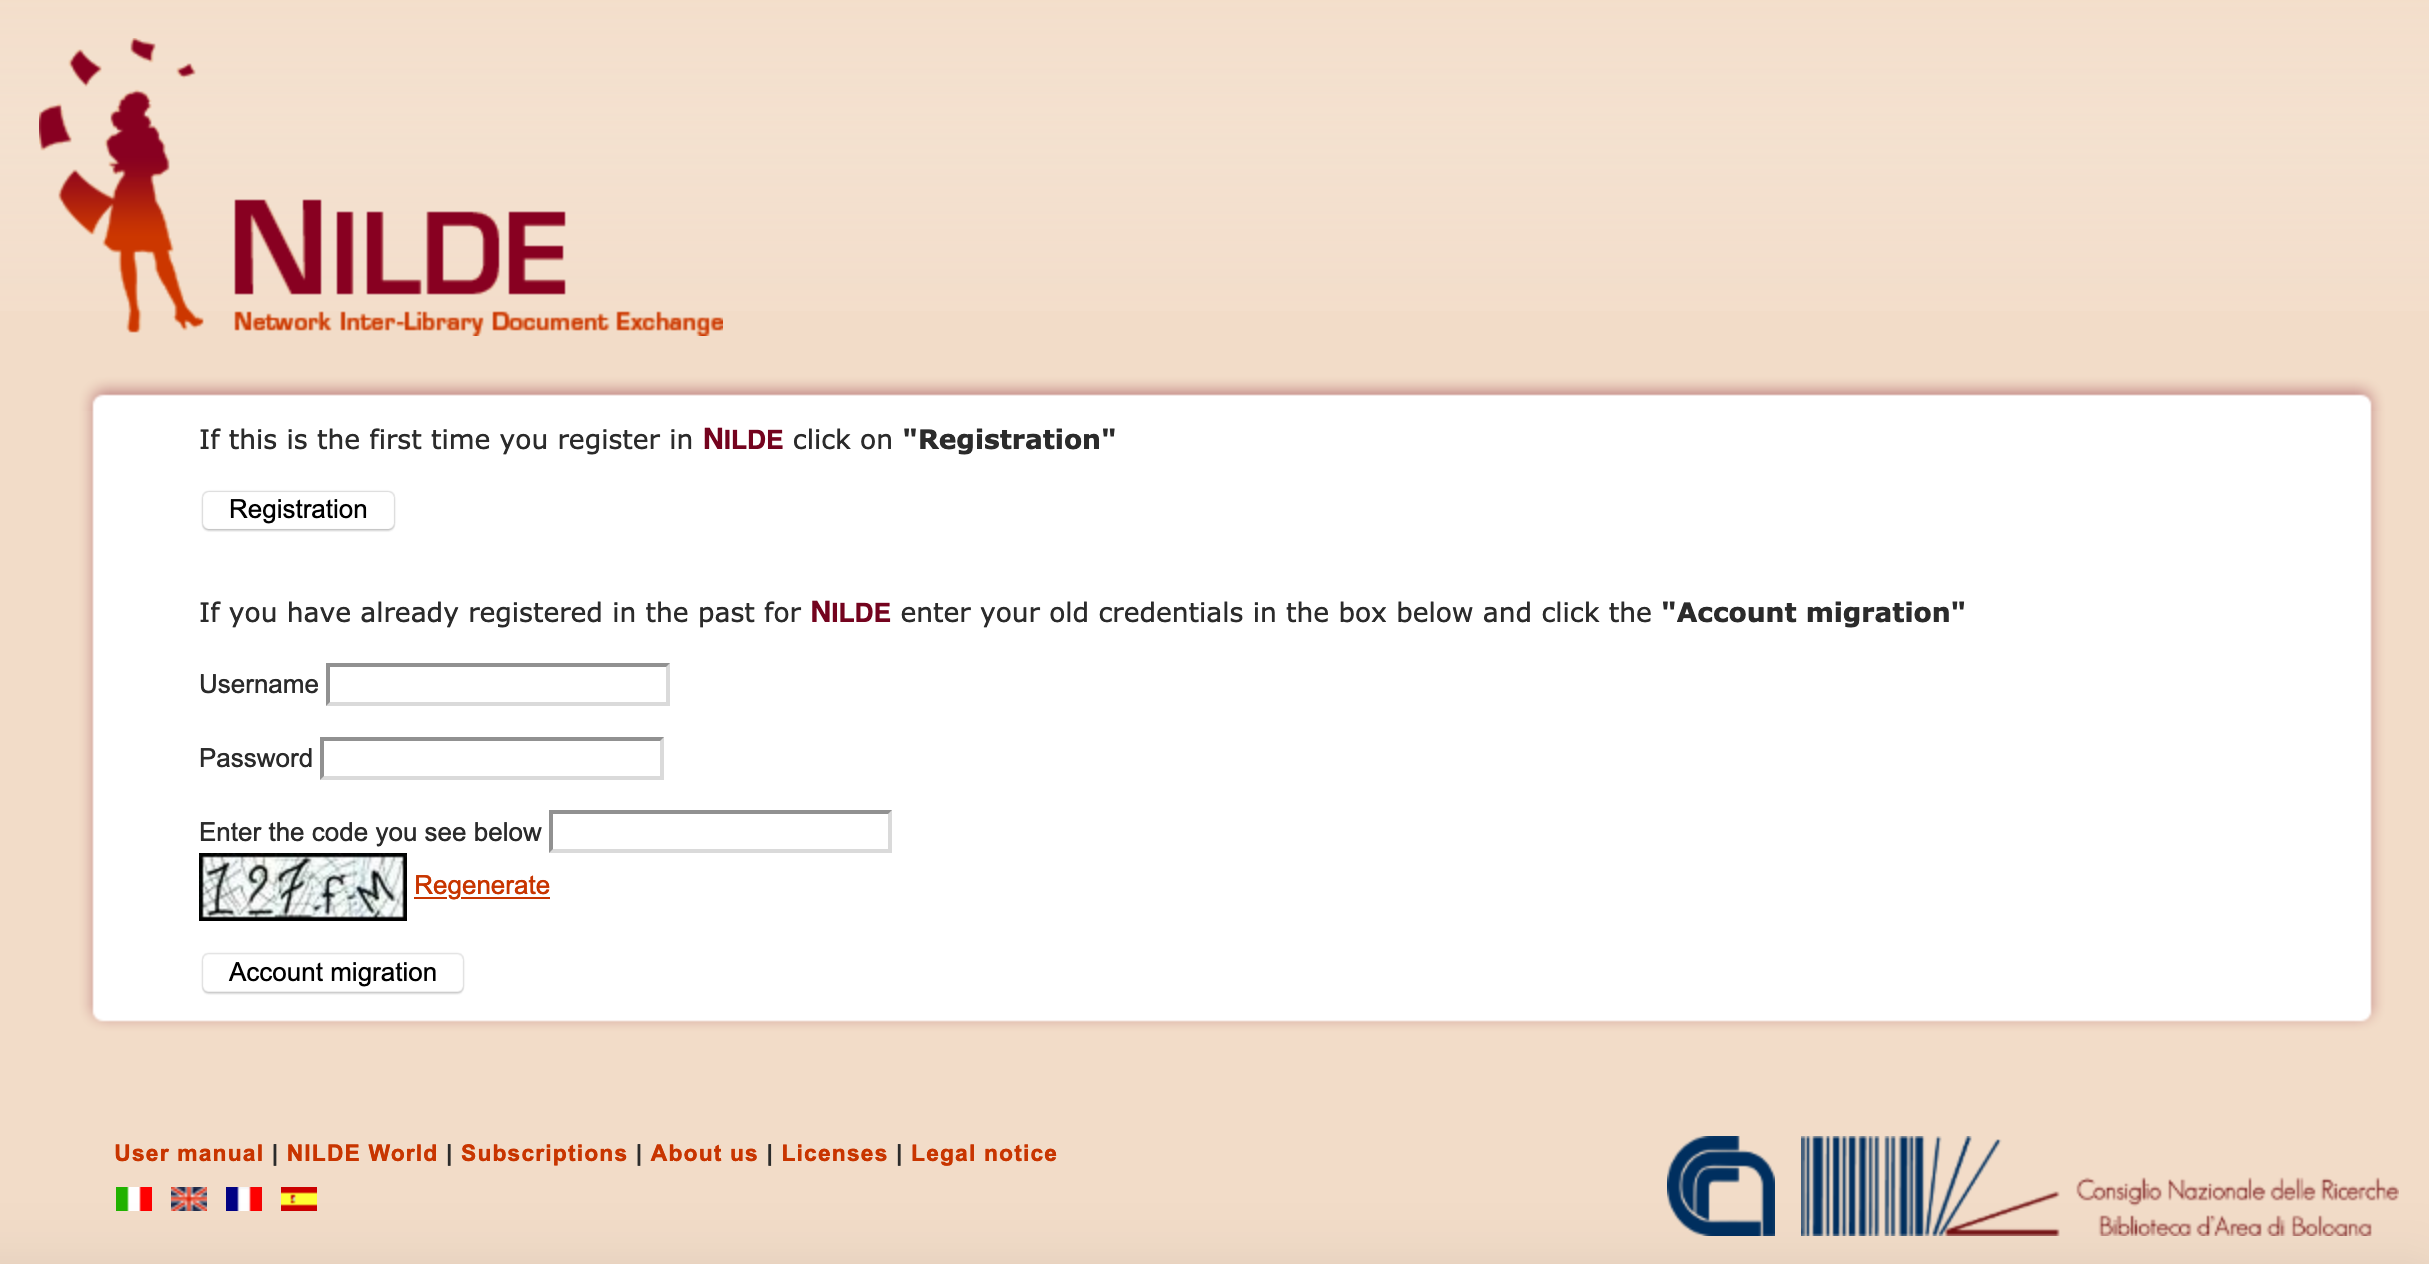
Figure 10: User registration with an institutional account, after the authentication on the Identity Provider of the Institution.
Then, the system will show a list of the libraries belonging to the Institution selected before and the user will be able to select the library which he wants to register to.

Figure 11: User registration with an institutional account: selection of the library which the user wants to register to.
The list shows only libraries belonging to the Institution.
Then, the user will have to fill in the form with personal details (as shown in fig. 4. The fields with * are mandatory).
Finally, a summary of the information indicated during the process will appear (see fig. 5).
If the registration has been successful, the system sends a mail to the user but he will not be able to use the account until the library has enabled him.
As far as the library has enabled the user account, the system will send another mail to confirm the activation of the account.
MIGRATION FROM A TRADITIONAL TO AN INSTITUTIONAL ACCOUNT
A user who has got institutional credentials and already has a NILDE traditional account, can make the “migration” process in order to login using institutional credentials since then, without losing the information about previous requests forwarded to the library.
To do that, the user must login to NILDE through the institutional login (IDEM-GARR) and then the system will show a page where the user must fill in username and password of his NILDE account (not the IDEM-GARR institutional account) in the required fields and click on “Migration account”, as shown in fig. 10.
At the end of the process, if successful, the user will be able to login to NILDE, using his institutional credentials.
Go to the Table of contents of End User Manual.