You are here
Borrowing: Request management
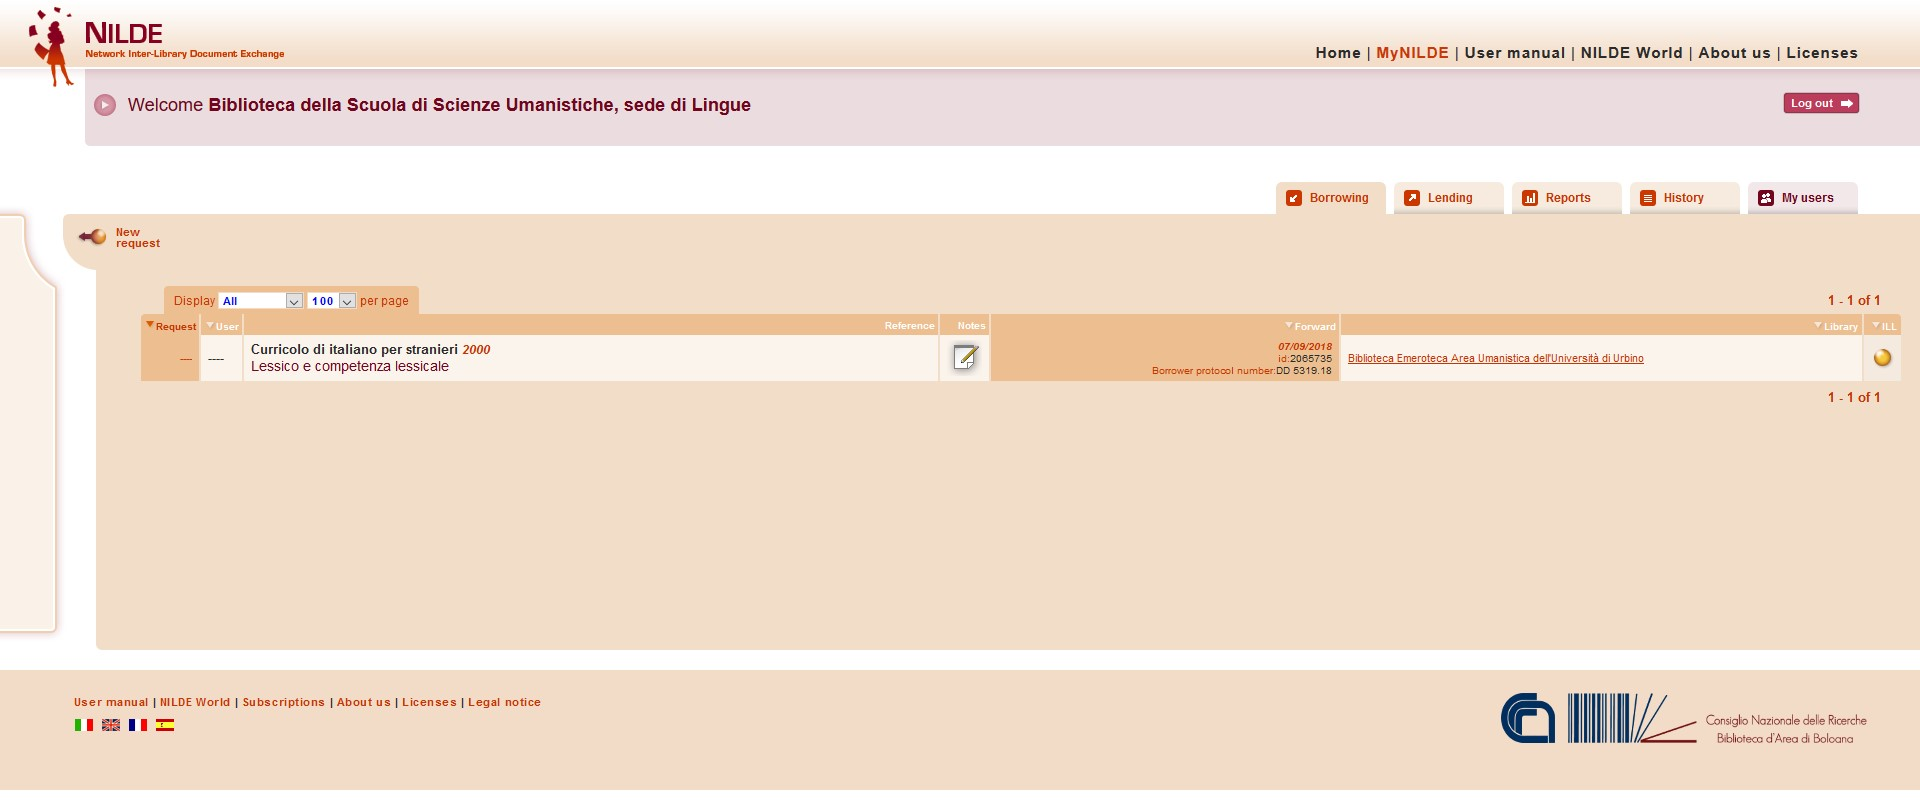
In the borrowing tab, requests in progress are displayed. The list of requests is subdivided into three sections. The first section starting from the left, made up of two columns, contains the information of user requests: date and ID of the user request and the name of the user. The second section, composed of the third column, contains information on the bibliographic reference. The third, composed of the last three columns, contains information regarding the forwarding of the request to the supplying library: date and ID of the forwarding, the name of the library to which the request is sent, and the status of the operation. The request is color-coded based on the status: white represents a new request received, orange represents a request on hold, green represents a fulfilled request from the supplying library, and red represents an unfulfilled request.
Click on the icon  to create “Notes for internal use” which will be visible from your account. Notes can serve as a way to pass information between you and your colleagues.
Once the note is saved, it will always be viewable from your account and can be accessed by clicking on the note icon
Notes are connected to separate requests. Another note could be created in the case of resubmitting a request.

To manually enter a new request, go to Manual entry of a request.
Managing a borrowing request requires four different phases: checking the bibliographic reference and contacting the requesting user, the identification of the journal or the book requested, searching for the supplying library, and the selection of the supplying library and forwarding the request.
1.Checking the Bibliographic Reference
By clicking on a request from the Borrowing tab, a window will open where you could add or edit bibliographical information; at the top of the page is the information about the user and the date and ID of the request.
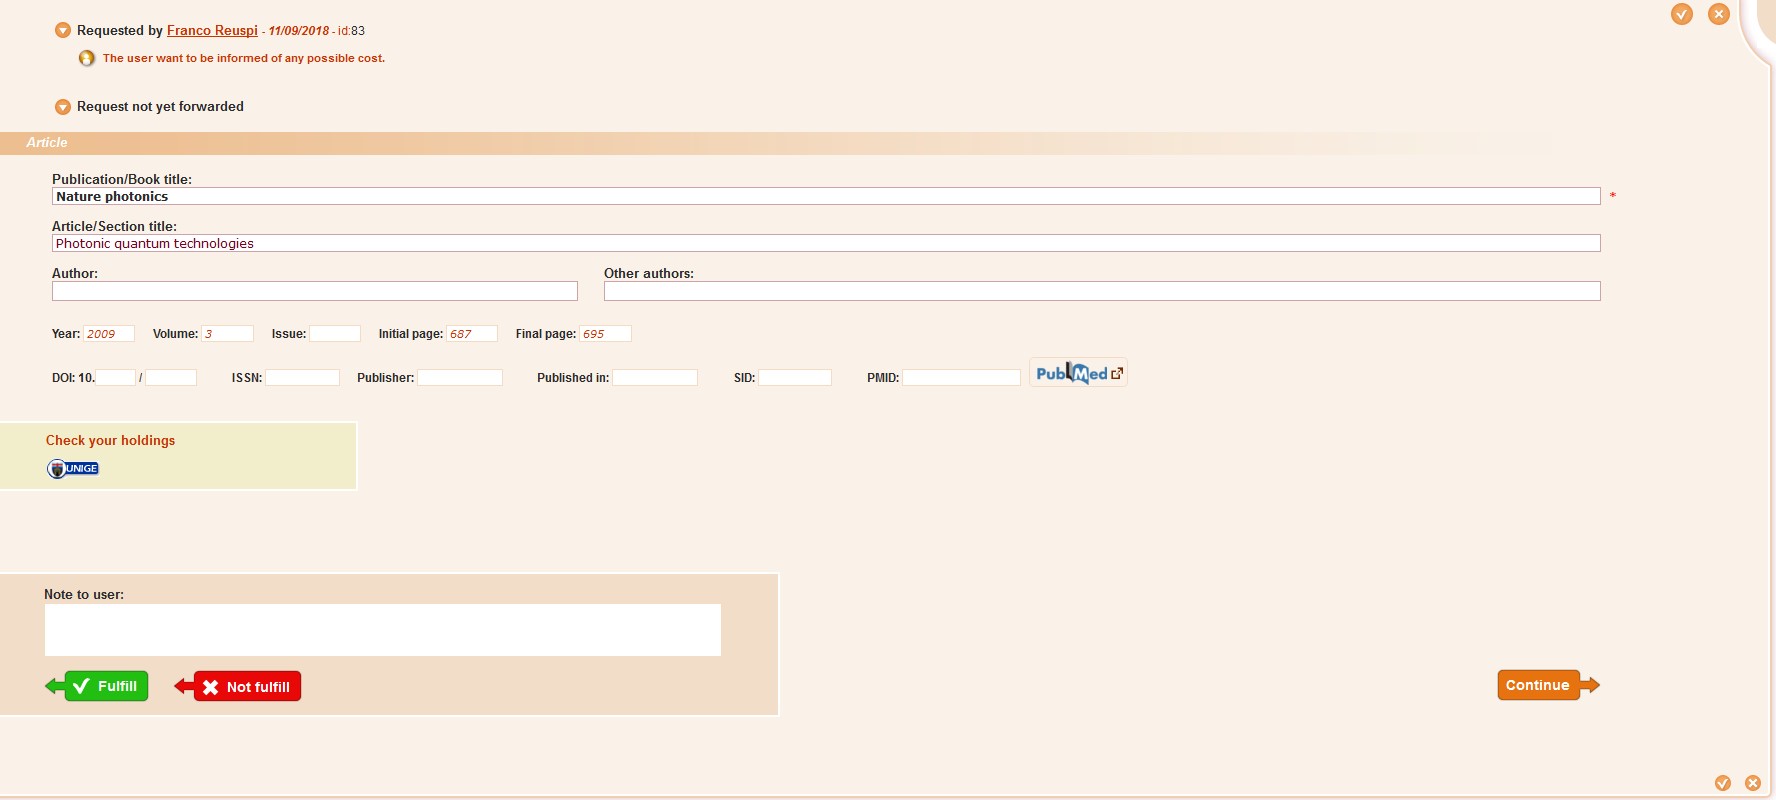
The two buttons  (save the request and close)
  (close the request panel) that appear on the top and bottom right-hand side of the page allow you to save any changes you have made or to close the request without saving.
If you have the PMID identifier, you can enter it in the PMID field and click on the button : NILDE will automatically import the bibliographic reference data from PUBMED.
If the library has configured its own Link resolver in NILDE (see Configuring NILDE as SFX source), the button Check your holdings will appear, allowing you to directly check through the Link resolver of the library if the document requested was already present in the resource catalog.
If you notice that the document is present in your library (paper version) or if it is a part of the electronic resources of your library, you can directly fulfill the request for the user by clicking on the button Fulfill and sending an explanatory note to the user .
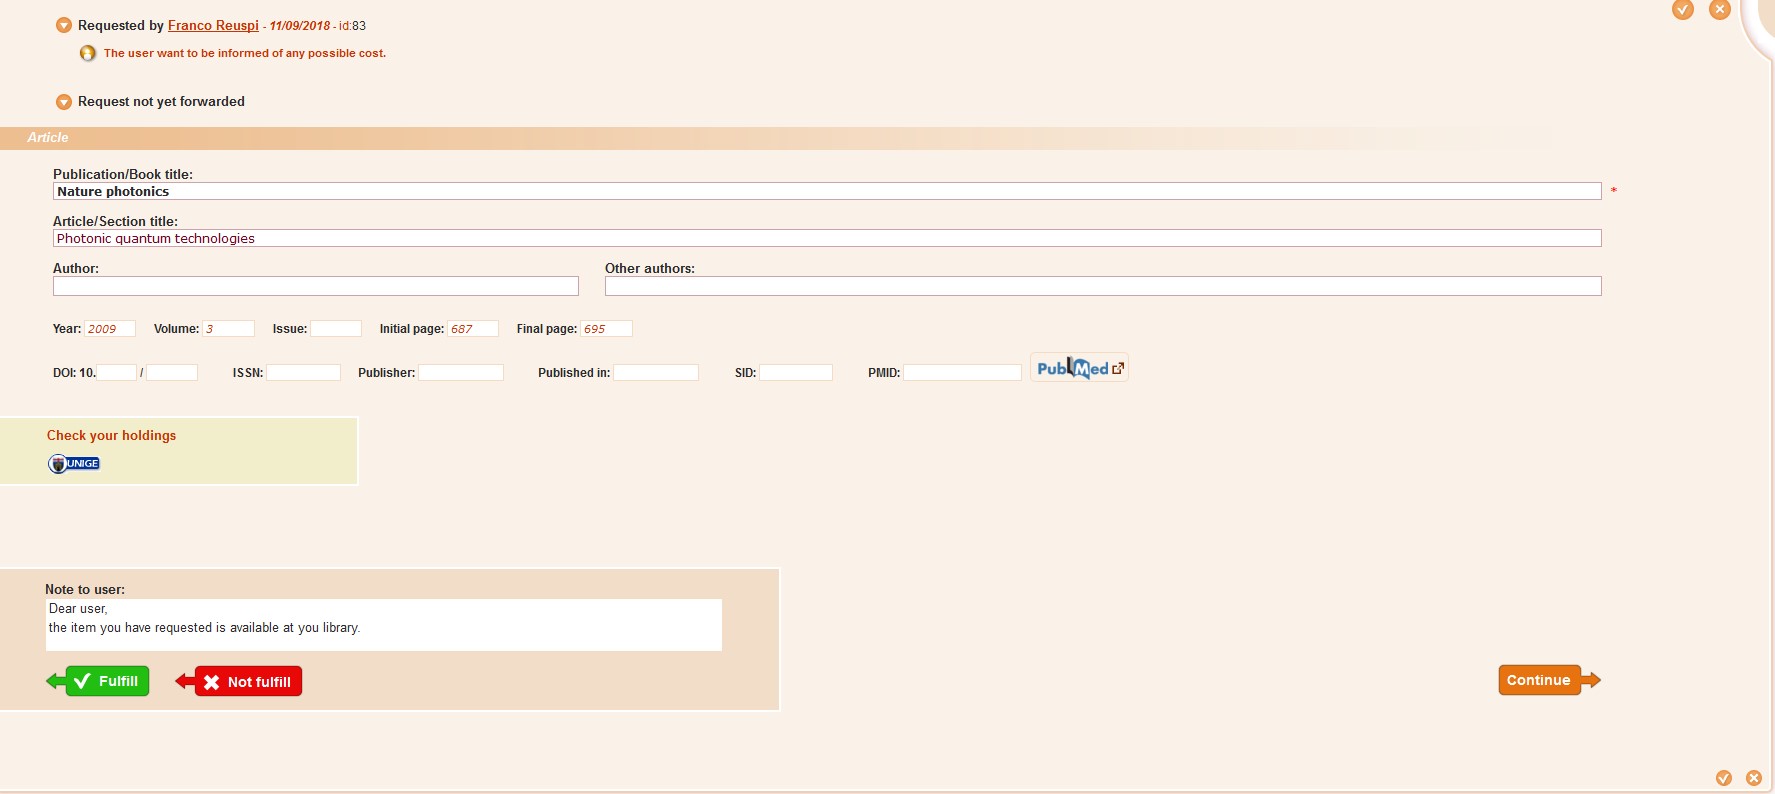
A directly fulfilled request (or unfulfilled) identifies in NILDE the requests inserted by users that can be completed (or not) without the need to submit them to another library.
2. Identification of the journal/publication or of the book
By clicking Continue, NILDE automatically searches for the ISSN (for an article of a journal) or the ISBN (for a part of a book).
In the first case NILDE, through ACNP query for ISSN (if already present) or through the title words of the journal (also abbreviated words), returns a list of standardized titles with the respective ISSNs: at this point you will have to search for the correct journal and select it.
The request is now overwritten with the standardized magazine title (according to the version of ACNP) and the ISSN is added to the request (if it was not present before).

If instead you are looking for a part of a book, the same research will be automatically completed by NILDE on SBN, and you will have to search for the right book in the list of results with the corresponding ISBN (if present in the catalog).
After choosing the right document (a journal with the relative ISSN or book with ISBN) NILDE opens a new window, where many tabs will appear, one for each catalog connected to NILDE. You could explore every one (MAI, ITALE, REBIUN) to find the library which owns the document you are looking for. The last three tabs: OTHERS, ALL and OUTSIDE NILDE are always present.
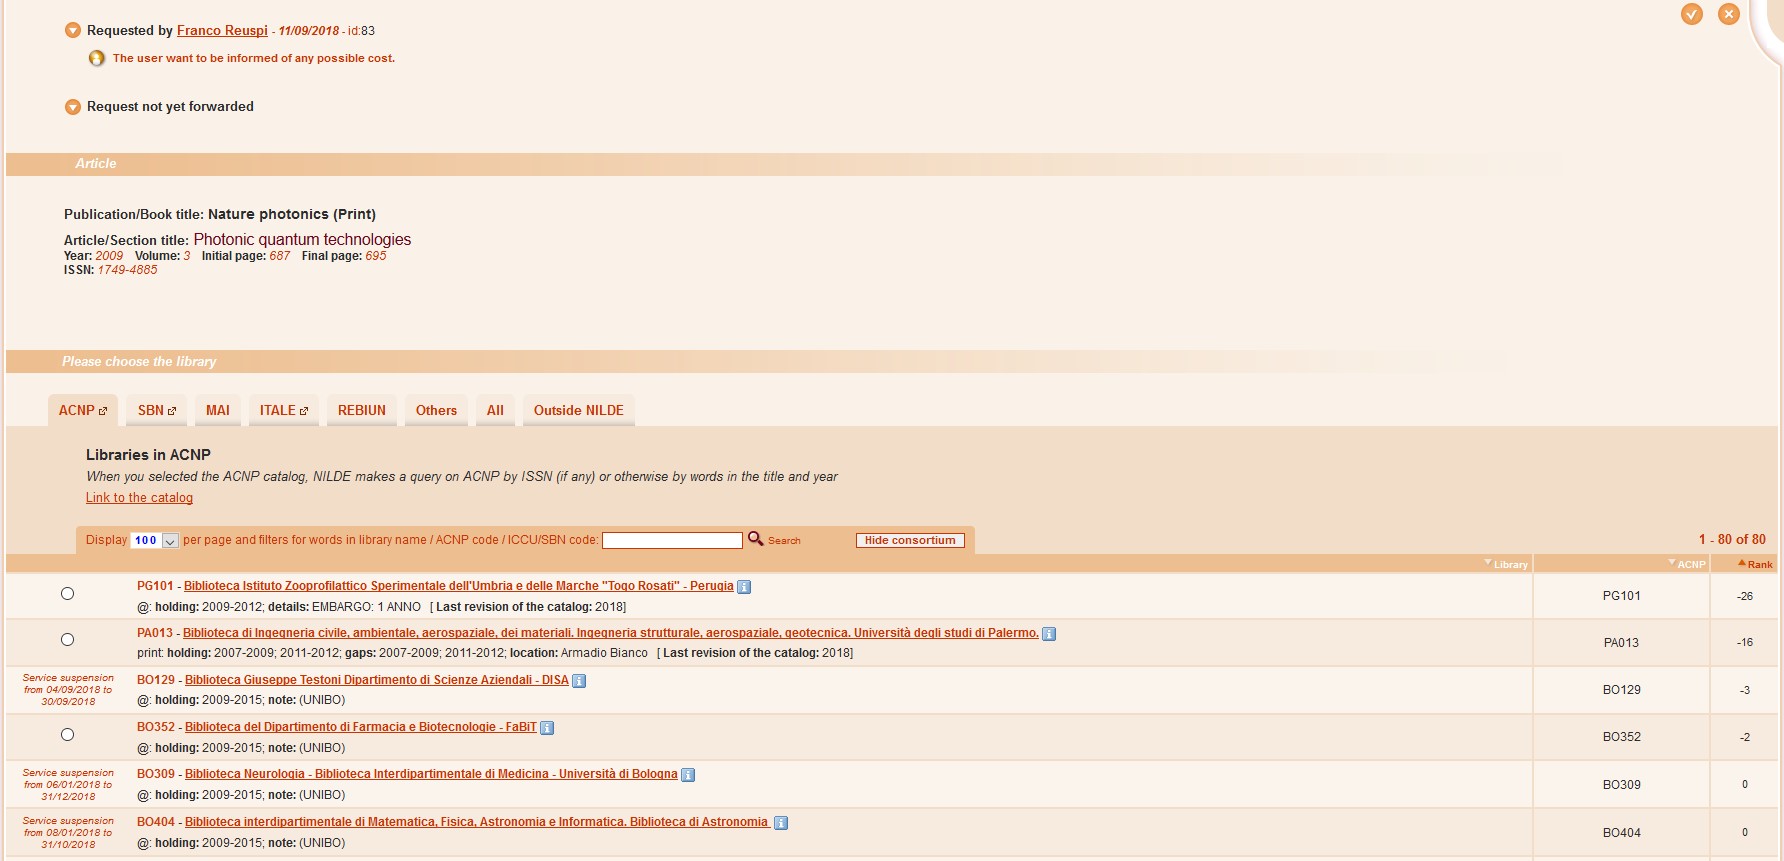
3. Search for the supplying library
After identifying the right journal or book, NILDE libraries occur in different tabs. If you are processing a journal NILDE will automatically open the ACNP tab; if you are dealing with a book, NILDE will open the SBN tab.
ACNP: through the query of the national ACNP catalog, the libraries that have the magazine will be displayed (identified by the ISSN) in order by the year of the bibliographic reference. In particular, all libraries are shown with the info about the type of subscription: print, online, or through a consortium, indicated in this way:
- print: "print:" + holding (years of owning rights);
- online: "@:" + holding (years of owning rights);
- consortium online: "@:" + holding (years of owning rights) + "note: (CONSORTIUM NAME)".

The button (in the orange bar at the top right) HIDE CONSORTIUM allows you to view only the libraries with at least one owned print, this will hide the libraries that have only one owned copy "inherited" from a consortium (FAQ). Clicking on the SHOW CONSORTIUM button returns to the complete list.

By clicking Back, the program returns to the page relating to the bibliographic data of the request (the Back button is displayed when your library has the selected journal).
SBN: by searching the national SBN catalog (Integration of NILDE with the catalogs), the libraries belonging to the catalog that own the journal or the part of a book (identified by ISSN or ISBN) are displayed. However, the correspondence of the holdings* with the year of the bibliographic reference are not verified, and it is therefore the responsibility of the library that submits the request for the verification of the estate held.
MAI : the form displays the list of libraries that adhere to the MAI metaopac (no searches are made on the metaopac, therefore it is the responsibility of the library that submits the request to check which libraries actually own the document).
ITALE: searching (with protocol Z39.50) the ALEPH catalogs of the institutions belonging to the ITALE association (ITALE is the Italian Association of ExLibris Users) (Integration of NILDE with the catalogs), will display the libraries that own the publication or the part of a book identified by ISSN or ISBN. Once again, the correspondence is not verified and it is the responsibility of the library that submits the request to check.
REBIUN: the form displays the list of libraries participating in the REBIUN catalog (national catalog of Spanish academic libraries); no direct searching is made in this catalog, and once again it is the responsibility of the library that submits the request to check which libraries own the document.
OTHERS: this tab displays the libraries not associated with any catalogue of previous boards (no searches are made, the libraries are responsible for searching and checking which libraries own the document.)
ALL: this tab shows the complete list of all the libraries belonging to NILDE, but without searching what documents they currently own.
OUTSIDE NILDE: the form displays the list of the libraries that are NOT yet a part of NILDE but have been registered in the system (see Borrowing: request outside NILDE).
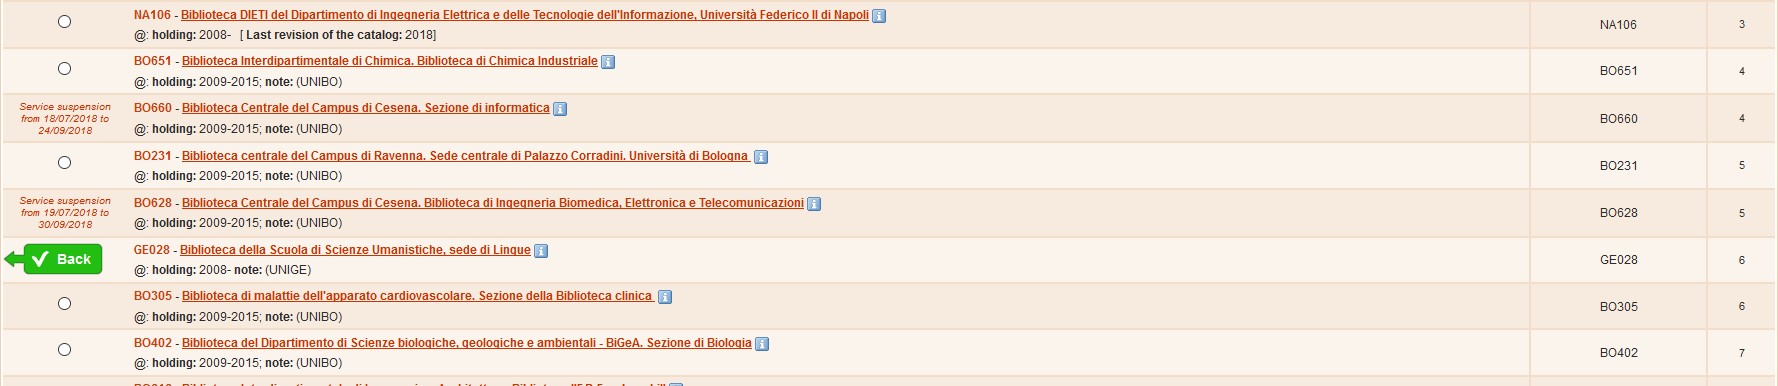
The list of the libraries in each tab is ranked according to a "weight" obtained by calculating all libraries for their "decompensation" rate (the difference between the number of documents supplied and the number of documents requested, in respect of all other libraries of the network). By using this method, NILDE will suggest the library that is best suited for the current request.
By clicking on the icon you can view the supplying conditions, the number of requests sent weekly, and the “decompensation” rate. Click on the name of the library to view the contact details.
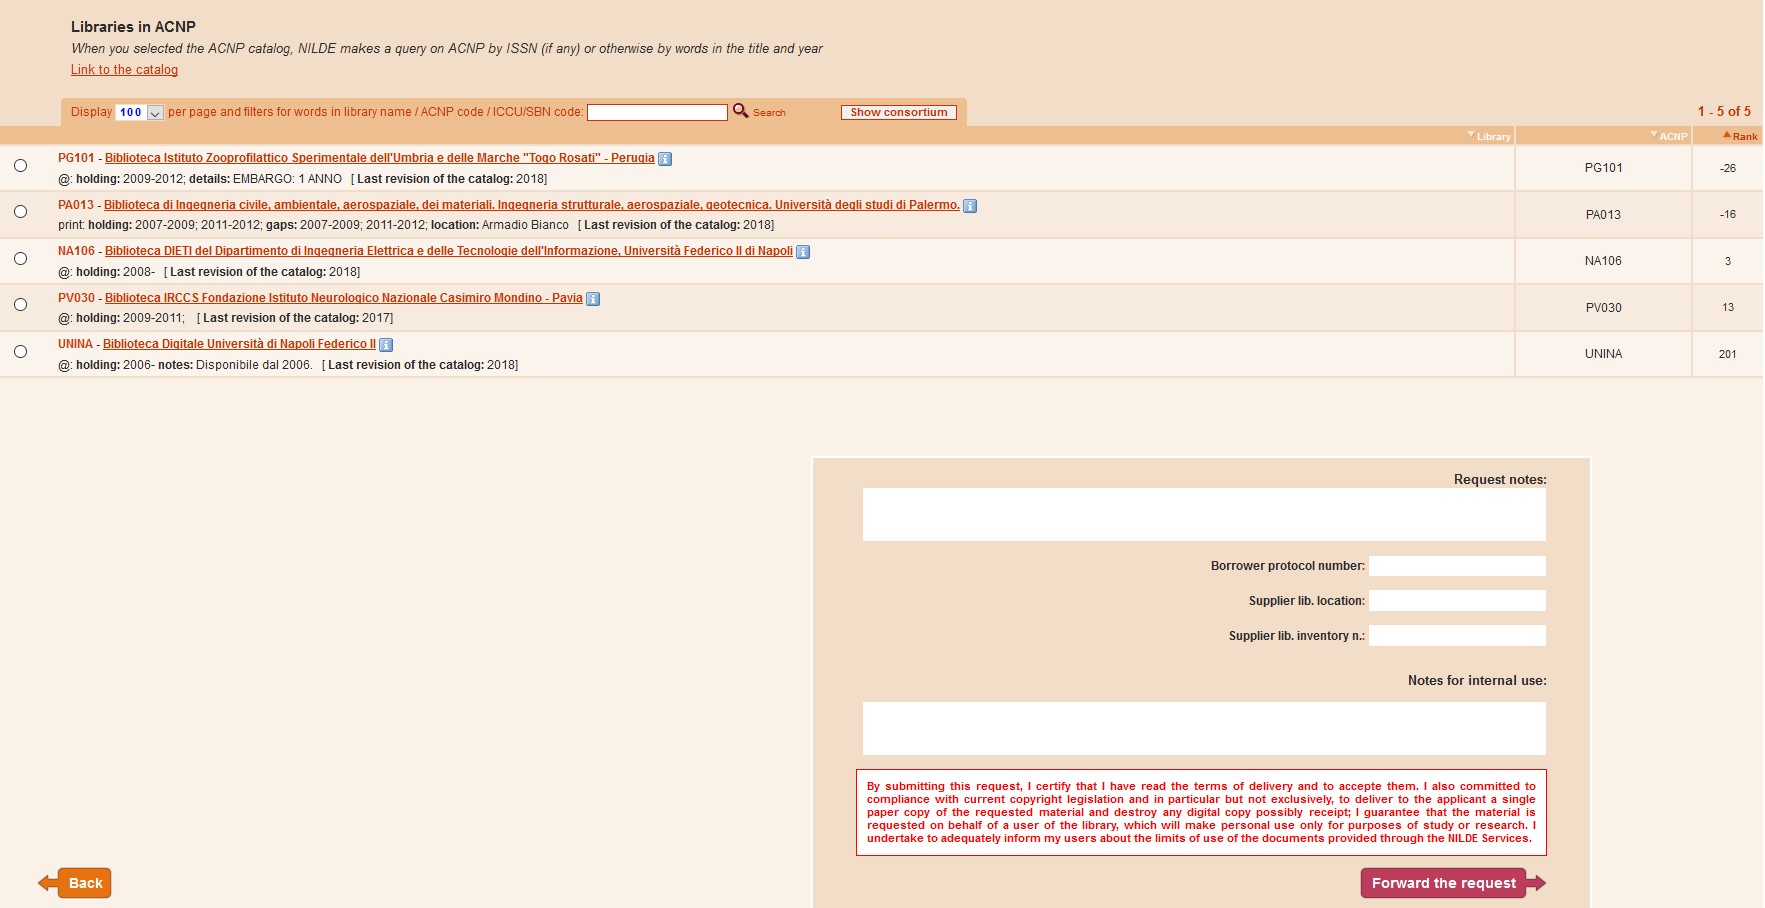
4. Selecting the Library and forwarding the request
Select the library and complete the operation by clicking on Forward the request in the box below, where additional information (Request notes, Borrower protocol number, Supplier lib. Location, Supplier lib. inventory n., Notes for internal use) can be inserted.
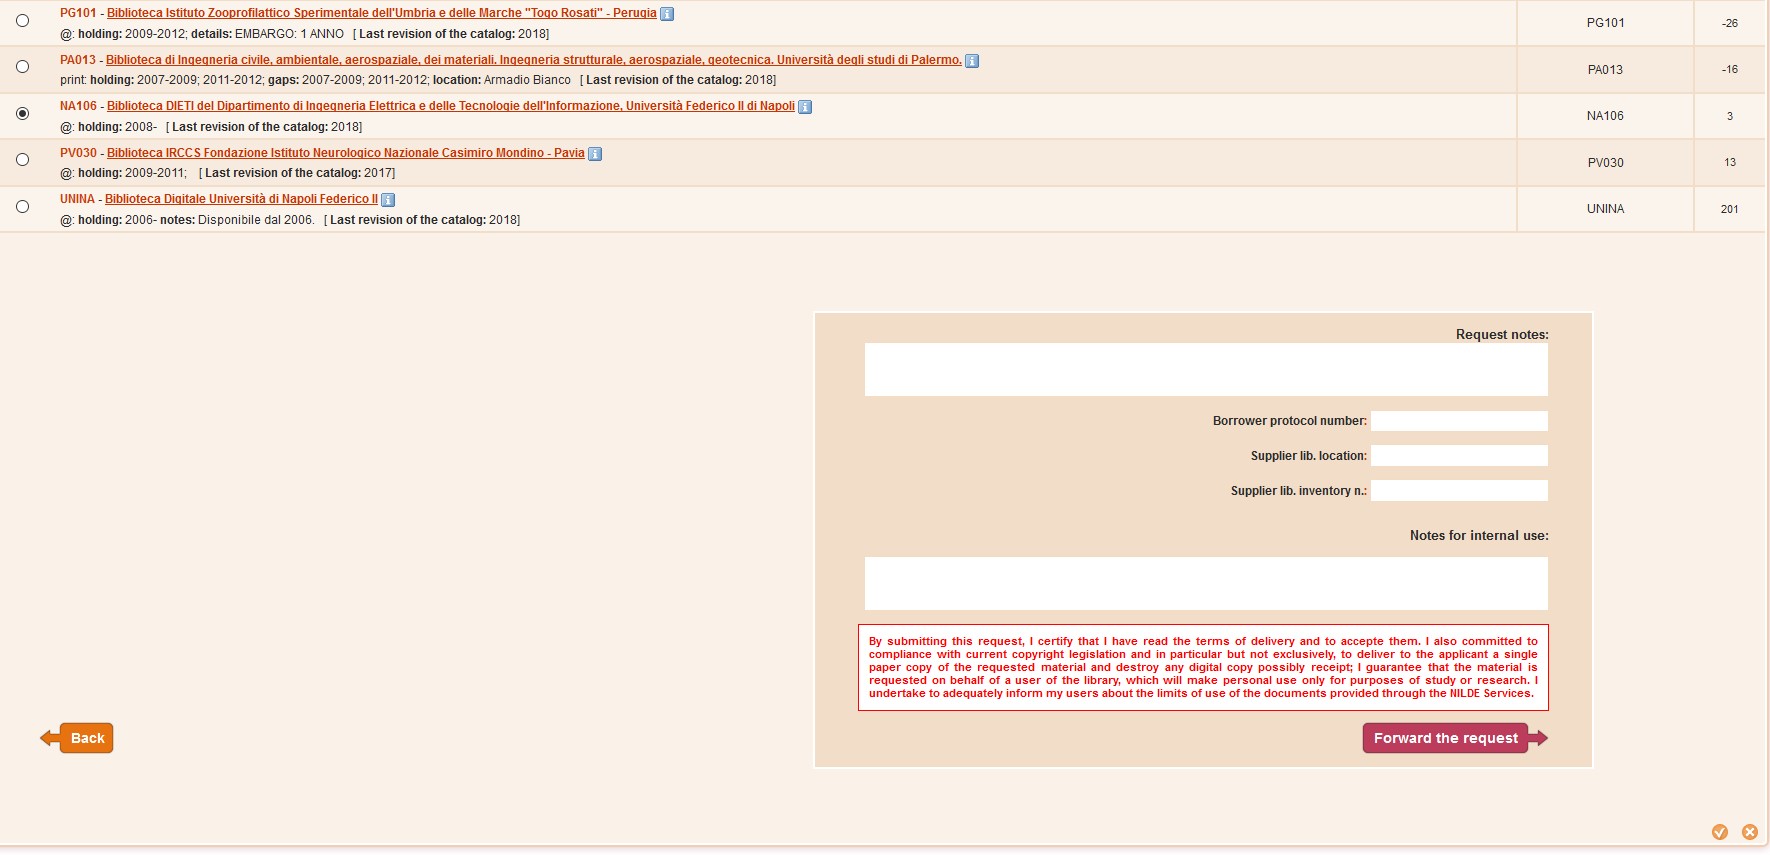
At ths point the request will be forwarded and will obtain an identification number.

Go to Response to a request.
Go to the Table of Contents in the Librarian user manual.